Summary
- When working with patterns, there are many cut lines that help the development process.
- These lines are essential for creating garments with precision and accuracy. Understanding them can greatly improve your workflow.
- Experience the future of the fashion industry with Audaces360 solutions. Sign up for your free trial today!
Every garment begins with a well-thought-out pattern. Patterns act as blueprints for clothing, guiding cutting and sewing. Among the many details in a pattern, cut lines play a critical role.
But what exactly are they? And why are they so important in pattern making? These questions are vital for any pattern maker looking to improve their skills.
In this text, you will discover what cut lines are and how to use them effectively. We’ll also explore the five most common types of cut lines and their specific purposes.
Happy reading!
Sumário
Why are cut lines important in pattern making?
Cut lines guide the cutting of fabric pieces. They ensure that each piece is the right size and shape. Without clear cut lines, patterns can become confusing.
Accurate cut lines help avoid fabric waste. They allow pattern makers to cut with precision. This saves materials and time during production.
They also maintain consistency. Whether you’re making one sample or many, these lines keep all pieces uniform.
Finally, cut lines help bring designs to life. They outline how to piece the fabric together, giving garments their shape and style.
Learn more: 3 basic principles to create your clothing pattern design
What are cut lines in garment pattern making?
Cut lines are markings on a pattern. They show where to cut the fabric and act as a guide for pattern makers and seamstresses.
Each cut line serves a purpose. Some indicate the outer edges of the garment, while others show where to adjust or join pieces. Knowing how to read and use these lines is key.
They can vary depending on the garment. Patterns for tailored suits, flowing dresses, or casual T-shirts may all have different types, for example.
Understanding them helps create accurate and professional garments.
Learn more: Explore the main types of patterns for fashion manufacturing
5 main types of cut lines in patterns
Every pattern includes several types of cut lines that can vary according to the garment. Let’s explore the five most common ones:
1) Main seams
The main seams are the primary lines that join the two pieces of fabric together. They are critical for creating the structure of the garment.
You usually can find them at the sides, shoulders, or center back of the garment.
When marking main seams, ensure that the pieces align correctly. These seams are often the most visible parts of the garment, so accurate cutting is essential.
Proper seam placement ensures that the garment fits well and maintains its shape.
As you create your cut lines, mark them with specific symbols or notations on the pattern to highlight their importance.
This helps to avoid confusion and guarantees the correct interpretation during the cutting and sewing process.
Learn more: What is pattern design and how to create it from scratch?
2) Dart lines
Darts shape garments to fit the body. They indicate where you should fold the fabric to create shaping details.
You can include them in areas like the bust, waist, or back of a garment.
They can add curves to flat pieces by creating structure and improving the fit. Without darts, many garments would look boxy or unflattering.
Pay close attention to the dart lines. Accurate sewing will make the darts lay flat and smooth, giving the garment a polished finish.
3) Grain lines
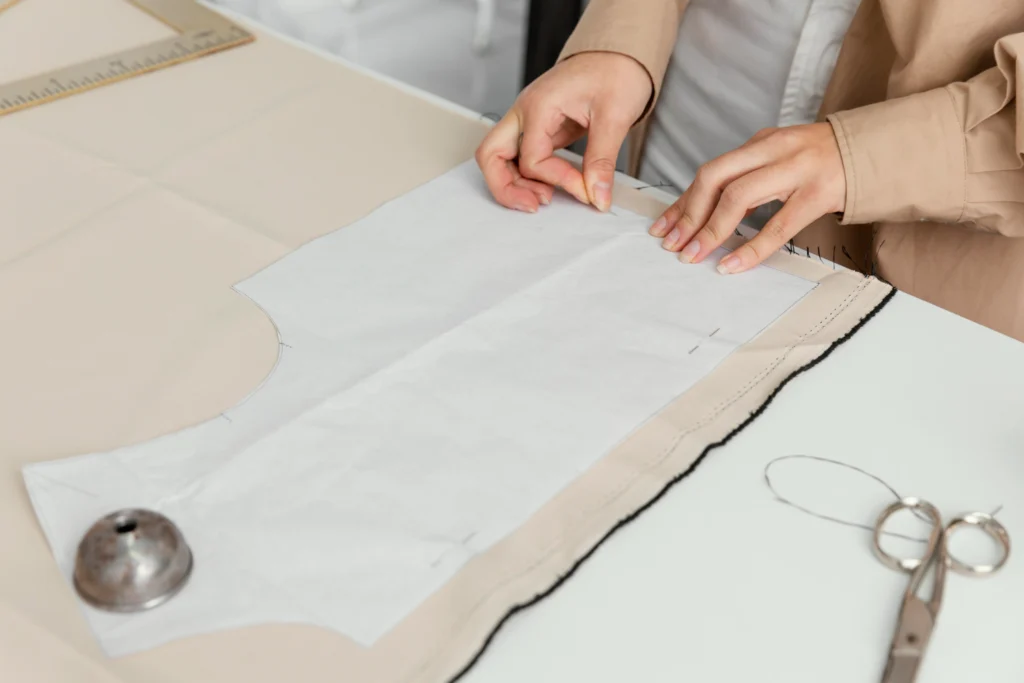
Grain lines show the direction of the fabric’s fibers. They are important for ensuring you cut the fabric in the right direction.
This guarantees that the garment will hang properly and behave as intended.
These cut lines are useful to guide the cutter in aligning the fabric with the grain. This is especially important for fabrics that have stretch or texture.
Cutting against the grain can affect the garment’s fit and drape. When you cut the fabric along the grain line, the garment will have the right amount of stretch and flow.
Grain lines are usually represented with arrows on the pattern. These arrows indicate the direction in which you should lay out the fabric before cutting.
4) Seam allowances
Seam allowances are the extra space around cut lines. They provide room for sewing and adjustments. Most patterns include specific seam allowance measurements.
They strengthen seams, ensuring durability, and allow for minor size adjustments if necessary.
Keep seam allowances even when cutting. Uneven allowances can make sewing more difficult.
5) Fold lines
Fold lines indicate where you should fold the fabric. They are important for symmetrical pieces or when cutting on the fabric fold.
Patterns often mark fold lines for center-front or back pieces. This avoids unnecessary seams and creates a cleaner look.
Accurate folding ensures symmetry. Follow the fold line exactly to prevent uneven cuts. It’s a simple but important step in pattern making.
Don’t let manual pattern making slow you down. Learn how Audaces technology can streamline your process. Download our whitepaper now!
How to create cut lines digitally?
Creating cut lines digitally in patterns involves using specialized software for pattern making.
They include tools that let you draw precise lines to meet the pattern’s requirements. You can also easily modify these cut lines, ensuring flexibility throughout the development process.
Here’s a simple guide to creating them directly on your computer:
- Choose the right software: select a solution like Audaces Pattern. It offers tools that offer precision and efficiency for creating patterns digitally.
- Import or draft your pattern: start by importing an existing pattern file or drafting a new one. Ensure the measurements and proportions are accurate.
- Identify key design elements: determine where cut lines are necessary. These might include darts, seams, or grain lines.
- Draw cut lines: use the software’s drawing tools to add cut lines. Select the line tool or curve tool as needed. Then, mark the lines precisely based on the pattern design and adjust the length and shape for accuracy.
- Apply annotations: label the cut lines to indicate their purpose (e.g., “Main Seam,” “Dart Line”). This helps during the cutting and sewing stages.
- Finalize your pattern: save it in the appropriate file format for sharing or production.
By creating cut lines digitally, you improve accuracy, save time, and make revisions easier.
Learn more: Step-by-step to create a shirt pattern on the computer
Benefits of applying cut lines to a digital pattern
Applying cut lines to a digital pattern offers several advantages. It improves the development process and overall efficiency in garment production.
By enhancing accuracy and clarity, cut lines make it easier to follow the pattern. See some of the advantages:
Easier interpretation
Cut lines in digital patterns make the design easier to understand. With clear lines marking where you should cut the pattern, there’s less room for mistakes.
Pattern makers, seamstresses, and manufacturers can quickly see where to cut, helping avoid confusion.
The digital format also allows for easy adjustments and real-time updates. This clarity improves communication across the entire team, ensuring everyone is on the same page.
In the long run, this reduces the chances of costly mistakes during production.
Learn more: 4 types of pleats to take your designs to the next level
Reduced rework
Using cut lines in digital patterns can significantly reduce rework. When cut lines are clear, it minimizes errors during cutting and sewing.
Pattern makers can review and adjust designs before production. This reduces the chances of mistakes that would otherwise require alterations later.
As a result, the process becomes more streamlined, saving both time and resources. Clear cut lines also prevent skipping steps, contributing to smoother manufacturing.
Learn more: 4 mistakes you should avoid in clothing fit
Increased production efficiency

Digital patterns with cut lines improve overall production efficiency. With accurate lines in place, production teams can quickly move from design to manufacturing.
This precision reduces the time spent checking and correcting errors. When cut lines are sharp, it also helps improve the speed of garment assembly.
Ultimately, this leads to faster turnaround times and more consistent results. By minimizing adjustments, the production process becomes faster and more reliable.
Learn more: Create a spiral pattern in 4 easy steps using your computer
Easily add cut lines to your patterns using Audaces Pattern
Audaces Pattern is the ideal solution for creating digital patterns and adding cut lines. It allows for easy development of new patterns with intuitive tools that help you avoid mistakes.
Create your patterns with high quality and precision. Ensure the correct development of all sizes, regardless of the level of complexity and number of details.
It works in an integrated way with other Audaces360 solutions, our complete suite of tools for the fashion industry.
Want to stay up to date on the latest fashion industry news? Subscribe to our newsletter!
FAQ
Cut lines guide the cutting of fabric pieces. They ensure that each piece is the right size and shape. Without clear cut lines, patterns can become confusing.
Cut lines are markings on a pattern. They show where to cut the fabric and act as a guide for pattern makers and seamstresses.
The main types of cut lines include main seams, dart lines, grain lines, seam allowances, and fold lines.


